
If you have ever watched an expensive electronic soil pH meter give you three different readings in the same spot within five minutes, you already know the frustration. I have been there, holding a probe that supposedly checks pH, moisture, and sunlight all at once, only to find it giving wildly inconsistent numbers. After going through two of these gadgets in a single growing season, I started looking for reliable ways to test soil pH at home without an electronic meter.
Turns out, gardeners have been checking their soil acidity and alkalinity for centuries using nothing more than pantry staples and careful observation. In this guide, I will walk you through four practical DIY methods to test soil pH without any electronic device. You will also learn what soil pH actually means, why it matters for your plants, when to test, and how to fix soil that is too acidic or too alkaline.
Whether you are growing tomatoes in raised beds, tending a flower garden, or checking the soil in your container plants on the balcony, these methods will give you a solid read on your soil condition. Let us get into it.
Table of Contents
What Is Soil pH and Why Does It Matter?
Soil pH measures how acidic or alkaline your soil is on a scale from 0 to 14. A pH of 7 is neutral. Anything below 7 is acidic, and anything above 7 is alkaline. Most garden vegetables and flowers thrive in a slightly acidic range between 6.0 and 7.0, though some plants like blueberries and azaleas prefer more acidic conditions around 4.5 to 5.5.
The reason pH matters so much comes down to nutrient availability. Your soil might be loaded with nitrogen, phosphorus, potassium, and trace minerals, but if the pH is off, your plants simply cannot absorb those nutrients. Think of pH as the key that unlocks the nutrient door. When the key does not fit, the nutrients stay locked inside the soil no matter how much fertilizer you add.
At extremely low pH levels (below 5.0), aluminum and manganese can become toxic to plants. At high pH levels (above 7.5), iron, zinc, and copper become locked out. This is why you might see yellowing leaves on your gardenias or stunted growth in your vegetable patch even though you fertilized regularly. The problem is not a lack of nutrients. The problem is pH.
Soil microbial activity also depends heavily on pH. Beneficial bacteria that break down organic matter and fix nitrogen work best in the 6.0 to 7.0 range. When pH drops too low or climbs too high, these helpful organisms slow down or die off, leaving your soil biologically inactive.
Regional differences play a role too. Areas with heavy rainfall tend to develop acidic soil over time because rain leaches away calcium and magnesium. Arid regions often have alkaline soil because minerals accumulate without being washed away. If you live in the Pacific Northwest, your soil likely trends acidic. If you garden in the Southwest, alkaline soil is more common. Knowing your regional baseline helps you interpret your DIY test results more accurately.
How to Test Soil pH at Home Without an Electronic Meter: 4 DIY Methods
You do not need a digital display or a battery-powered probe to get a meaningful reading of your soil pH. Here are four methods you can use with items you probably already have at home or can pick up for just a few dollars.
Each method varies in precision, but all of them will tell you whether your soil leans acidic, alkaline, or sits near neutral. For most home gardeners, that is exactly the information you need to make smart planting and amending decisions.
I recommend trying at least two of these methods on the same soil sample. When both point to the same conclusion, you can feel confident in the result. When they disagree, a third test breaks the tie.
Method 1: The Vinegar and Baking Soda Test
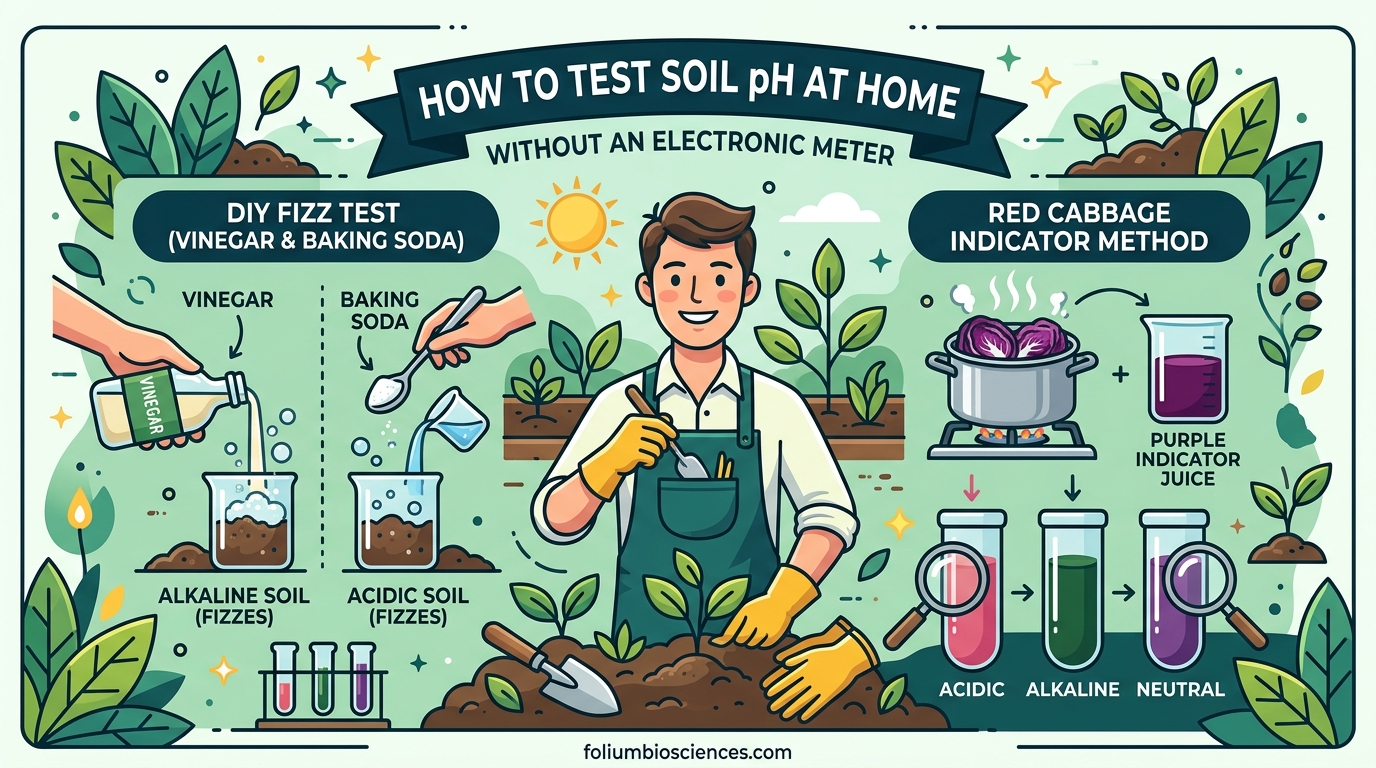
This is the most popular DIY soil pH test, and for good reason. It uses two common household items and gives you a visible chemical reaction that is easy to interpret. The science behind it is straightforward: vinegar is acidic, so it reacts with alkaline soil. Baking soda is alkaline, so it reacts with acidic soil. The fizzing you see is carbon dioxide gas being released.
Materials you will need:
- White distilled vinegar
- Baking soda
- Distilled water (tap water can throw off results)
- Two small bowls or cups
- A clean spoon or trowel
- Garden soil sample
Step-by-step instructions:
Step 1: Collect your soil sample. Dig down about 4 to 6 inches in the area you want to test. Take soil from several spots and mix it together in a clean container. Remove rocks, roots, and debris. You want a few tablespoons of clean, loose soil.
Step 2: Split the sample. Divide your soil into two equal portions. Place each portion into its own bowl or cup.
Step 3: Test for alkalinity with vinegar. Add enough white vinegar to the first bowl to moisten the soil thoroughly. If the soil fizzles or bubbles, your soil is alkaline, meaning the pH is above 7. The stronger the fizzing, the more alkaline the soil likely is. A vigorous, foaming reaction suggests pH well above 7.5.
Step 4: Test for acidity with baking soda. To the second bowl, add a small amount of baking soda (about a tablespoon). Then add distilled water until you get a thick, muddy paste. Stir it gently. If this mixture fizzes or bubbles, your soil is acidic, meaning the pH is below 7. Again, stronger fizzing indicates more extreme acidity.
Step 5: Interpret the results. If the vinegar sample fizzed but the baking soda sample did not, your soil is alkaline. If the baking soda sample fizzed but the vinegar did not, your soil is acidic. If neither sample fizzed, your soil is likely close to neutral (pH around 7). If both samples fizzed slightly, your soil may be near the middle of the scale but leaning in the direction of the stronger reaction.
This method will not give you an exact number, but it reliably tells you which direction your soil pH falls. For a quick, free check using items from your kitchen, it is remarkably useful. I have used this test on every garden I have planted over the past six years, and it has never steered me wrong when it comes to identifying a problem.
Method 2: Using pH Test Strips
pH test strips are the next step up in accuracy without going electronic. You can find these at garden centers, hardware stores, or online for just a few dollars. They are the same type of strips used for testing pool water or aquariums, but you need the ones that measure a range suitable for soil (typically 4.0 to 9.0).
Materials you will need:
- pH test strips (garden or wide-range type)
- Distilled water
- A small jar or cup with a lid
- Coffee filter or fine mesh strainer (optional but helpful)
- Garden soil sample
Step-by-step instructions:
Step 1: Make a soil slurry. Place 2 tablespoons of soil into your jar. Add 4 tablespoons of distilled water. Put the lid on and shake vigorously for about 30 seconds. The slurry method is the preferred approach among experienced growers because it extracts the pH from the soil solution more effectively than testing dry soil directly.
Step 2: Let it settle. Set the jar aside for 15 to 30 minutes. You want the soil particles to settle to the bottom, leaving the water on top relatively clear. For an even cleaner sample, pour the liquid through a coffee filter after it settles. This removes fine particles that can discolor your test strip and make the color harder to read.
Step 3: Dip the strip. Dip a pH test strip into the water portion of your slurry. Hold it there for the time recommended on the strip packaging (usually 1 to 3 seconds).
Step 4: Read the color. Remove the strip and wait the recommended time for the color to develop (usually 15 to 30 seconds). Compare the color of the strip to the color chart on the packaging. This will give you a numerical pH reading. Hold the strip right next to the chart and compare under natural daylight for the most accurate color match.
Step 5: Test multiple samples. For the most accurate picture of your garden, test soil from several different areas separately. Soil pH can vary significantly across a single yard, especially near foundations, under trees, or in areas where amendments were previously added.
The main advantage of test strips is that they give you an actual number rather than just “acidic” or “alkaline.” The trade-off is that reading the color match can be subjective. Forum gardeners frequently mention this difficulty. One tip from the gardening community: if the color falls between two values on the chart, split the difference. A reading between 6.0 and 6.5 is probably around 6.2 or 6.3.
Method 3: The Red Cabbage Indicator Method
This method is less commonly discussed in gardening circles, but it is one of the oldest pH testing techniques around. Red cabbage contains anthocyanin, a pigment that changes color depending on the pH of the solution it contacts. In acidic conditions, it turns pink or red. In neutral conditions, it stays purple. In alkaline conditions, it shifts to green, blue, or even yellow.
This is a method that most competing guides skip entirely, which is a shame because it provides a vivid, intuitive reading that is especially helpful for visual learners and anyone gardening with children.
Materials you will need:
- Half a head of red cabbage
- A pot for boiling water
- A strainer or colander
- A clear glass jar or cup
- Distilled water
- Garden soil sample
- White plate or bowl for color comparison
Step-by-step instructions:
Step 1: Make the cabbage juice indicator. Chop the red cabbage into small pieces. Place them in a pot and add enough distilled water to cover the cabbage. Bring to a boil, then reduce heat and simmer for 10 minutes. Let it cool to room temperature.
Step 2: Strain the liquid. Pour the mixture through a strainer into a clean jar. You should have a deep purple liquid. This is your pH indicator solution. You can store any leftover indicator in the refrigerator for up to a week in a sealed jar.
Step 3: Prepare your soil sample. Mix 2 tablespoons of soil with 4 tablespoons of distilled water in a cup. Stir well and let it sit for 15 minutes. Pour off the clear liquid on top into another cup, filtering through a coffee filter if needed.
Step 4: Combine and observe. Add a few tablespoons of the cabbage indicator to your soil water sample. Stir gently and watch the color change. Pour the mixture onto a white plate for better color visibility.
Step 5: Read the results.
- Pink or red: Acidic soil (pH below 7)
- Purple: Near neutral (pH around 7)
- Blue or green: Alkaline soil (pH above 7)
- Yellow: Strongly alkaline (pH above 8)
This method takes a bit more effort but produces a vivid color change that is genuinely satisfying to watch. It is also a great project if you have kids who are learning about chemistry or gardening. The main limitation is the same as the vinegar and baking soda method: it gives you a range rather than an exact number. However, you can calibrate your eye by testing the indicator against known substances first. Try adding a drop of vinegar to one sample of indicator (should turn pink) and a pinch of baking soda to another (should turn green or blue). This gives you reference colors for comparison.
Method 4: Visual Soil Inspection and Weed Indicators
Before pH test kits existed, farmers and gardeners relied on visual clues to assess their soil. This approach has been used for generations, including by Amish communities who have passed down soil-reading knowledge through practical experience. While it is the least precise of the four methods, it costs nothing and gives you useful context about your soil.
Soil color clues:
Dark, rich, crumbly soil with a deep brown or black color typically indicates healthy organic content and often a near-neutral pH. Pale or whitish soil tends to be alkaline and may be high in sand or calcium carbonate. Reddish or yellowish soil often indicates the presence of iron oxides, which can suggest acidic conditions, especially in clay-heavy regions.
Texture and structure:
Soil that forms a hard crust when dry and cracks easily is often high in clay and may trend alkaline. Sandy, loose soil that drains very quickly can lean acidic, especially in areas with high rainfall. Loamy soil that holds moisture without becoming waterlogged usually indicates a balanced pH and good organic matter content.
You can perform a simple ribbon test to gauge texture. Grab a handful of moist soil and squeeze it into a ball. Then push the soil upward between your thumb and forefinger to form a ribbon. If the ribbon breaks quickly (under 1 inch), you have sandy soil. If it forms a long ribbon (2 inches or more), you have clay soil. Loam soil forms a ribbon about 1 to 2 inches long before breaking. This texture information pairs with your pH results to give you a more complete soil profile.
Weed indicators:
Certain weeds thrive in specific pH conditions. If you notice them dominating an area, they can hint at your soil chemistry.
- Dandelions and chickweed often grow in slightly acidic to neutral soil (pH 5.5 to 7.0)
- Queen Anne’s lace and plantain tend to appear in alkaline soil (pH above 7.0)
- Moss growing in your lawn strongly suggests acidic conditions (pH below 5.5)
- Chicory and bindweed can indicate alkaline conditions
- Horsetail and sorrel are classic signs of acidic soil
I want to be clear that weed indicators are a supplementary tool, not a standalone test. Many weeds are adaptable and grow in a range of conditions. But when you combine visual soil inspection with one of the other DIY methods above, you get a much fuller picture of what is happening underground.
When and How Often Should You Test Soil pH?
Timing matters more than most gardeners realize. The best time to test your soil pH is in early spring before you plant, or in fall after the growing season ends. These windows give you time to make adjustments before the next crop goes in.
If you are testing because your plants are struggling, test immediately. Yellowing leaves, stunted growth, or poor fruit production can all point to pH problems. Catching the issue mid-season and making a quick correction can save your harvest.
For established gardens, testing once a year is usually sufficient. If you are actively amending your soil by adding lime, sulfur, or large amounts of compost, test again 3 to 4 months after applying amendments. pH changes take time, and testing too soon will give you misleading results.
Container gardens and raised beds need more frequent testing than in-ground gardens. The smaller volume of soil in containers means pH can shift faster due to fertilizer use, watering with tap water, or rain leaching minerals. I recommend testing container soil every 4 to 6 months.
New garden beds deserve special attention. If you are starting a garden in a new yard, testing before you plant anything is essential. You may discover that your soil needs significant amendment before it will support healthy growth. Spending a season preparing the soil beats watching your first crop fail.
Avoid testing right after a heavy rain or immediately after fertilizing. Both can temporarily alter your soil pH reading. Wait at least 48 hours after rain or fertilizer application for the most accurate results.
How to Collect a Proper Soil Sample
Even the best testing method will give you bad results if your soil sample is bad. Collecting a representative sample is a critical step that many gardeners skip.
Start by clearing away surface debris like leaves, mulch, and grass from the area you want to test. Dig down 4 to 6 inches for garden beds or 2 to 3 inches for lawns. Take a vertical slice of soil from the side of your hole, not a scoop from the surface. Surface soil often has a different pH than the root zone where your plants are actually feeding.
Collect samples from at least 5 different spots in the area you are testing. Mix them together in a clean plastic bucket. Remove rocks, roots, and organic matter. Break up any clumps. This combined sample gives you an average pH for the entire area rather than a reading from one isolated spot.
For container plants, scrape away the top half-inch of soil and sample from the middle of the pot. Avoid the edges where minerals from tap water can accumulate. Take your sample from the root zone where the plant is actively drawing nutrients.
Use a clean container. Residue from soap, food, or chemicals will contaminate your sample and distort results. Glass or plastic works well. Avoid galvanized metal containers, which can interfere with the chemical reactions in your test.
Let your sample air dry if it is wet from recent rain or irrigation. Wet soil can dilute your test solution and produce inaccurate readings. Spread the soil on a clean sheet of paper and let it dry for a few hours before testing.
Optimal Soil pH Ranges for Common Garden Plants
Different plants have different pH preferences. Here is a quick reference to help you match your soil to what you want to grow.
Vegetables that prefer slightly acidic soil (pH 5.5 to 6.8):
- Tomatoes: 5.5 to 6.8
- Peppers: 5.5 to 6.5
- Cucumbers: 5.5 to 6.5
- Carrots: 5.5 to 6.5
- Lettuce and spinach: 6.0 to 6.5
- Potatoes: 4.8 to 5.5 (more acidic)
- Beans and peas: 6.0 to 6.8
- Squash and zucchini: 5.5 to 6.5
- Onions and garlic: 6.0 to 6.5
Fruit plants with specific pH needs:
- Blueberries: 4.5 to 5.5 (strongly acidic)
- Strawberries: 5.5 to 6.5
- Raspberries and blackberries: 5.5 to 6.5
- Grapevines: 5.5 to 6.5
Flowers and shrubs:
- Rhododendrons and azaleas: 4.5 to 5.5 (strongly acidic)
- Hydrangeas: 5.0 to 5.5 for blue flowers, 6.5 to 7.0 for pink flowers
- Roses: 6.0 to 6.5
- Lavender: 6.5 to 7.5 (prefers alkaline conditions)
- Lilacs: 6.5 to 7.0
- Camellias: 4.5 to 5.5 (acidic)
Herbs:
- Basil: 5.5 to 6.5
- Mint: 6.0 to 7.0
- Rosemary: 6.0 to 7.0
- Thyme: 6.0 to 7.0
Most popular garden vegetables fall into that 6.0 to 7.0 sweet spot. If your DIY tests show your soil near that range, you are in good shape for general gardening. If you are growing acid-lovers like blueberries, rhododendrons, or potatoes, you need to confirm your pH is below 6.0.
Hydrangeas deserve a special note because their flower color is directly tied to soil pH. Acidic soil (pH 5.0 to 5.5) makes aluminum available to the plant, producing blue flowers. Alkaline soil (pH 6.5 to 7.0) locks out aluminum, producing pink flowers. If you want to change your hydrangea from pink to blue or vice versa, adjusting your soil pH is the way to do it.
How to Amend Soil pH Naturally
Once you know your soil pH, you may need to adjust it. The good news is that there are natural, organic ways to shift pH in either direction without resorting to synthetic chemicals. The less good news is that changing soil pH takes patience. Plan on several months for noticeable shifts.
Raising Soil pH (Making Acidic Soil Less Acidic)
If your DIY test shows acidic soil (below 6.0) and you want to grow vegetables or flowers that prefer near-neutral conditions, you need to raise the pH. Here are the most effective natural methods.
Agricultural lime (calcium carbonate): This is the standard amendment for raising soil pH. It works slowly, taking 3 to 6 months to fully affect pH. Apply it in fall for spring planting. For a standard garden bed, spread about 5 pounds of lime per 100 square feet and work it into the top 4 to 6 inches of soil. Retest after 3 months to see if you need more. Dolomitic lime also adds magnesium, making it a good choice for soils deficient in that mineral.
Wood ash: Hardwood ash from your fireplace or fire pit is a free source of alkalinity. It raises pH faster than lime but does not last as long. Use about half the amount you would use for lime. Avoid using ash from treated or painted wood, which can introduce toxins. Wood ash also adds potassium and trace minerals, so it feeds your soil while adjusting pH.
Crushed eggshells: Eggshells add calcium and have a mild alkalinizing effect over time. They break down slowly, so they are better as a long-term soil conditioner than a quick fix. Crush them finely and mix into the soil for faster results. A coffee grinder works well for pulverizing eggshells into a powder that decomposes quickly.
Oyster shell flour: Popular in organic gardening, oyster shell flour provides calcium and raises pH gradually. It also improves soil structure in clay-heavy areas. Apply it at roughly the same rate as agricultural lime.
Lowering Soil pH (Making Alkaline Soil More Acidic)
If your tests show alkaline soil (above 7.0) and you want to grow acid-loving plants, you need to lower the pH. This is generally harder than raising it, so be patient.
Elemental sulfur: This is the most reliable way to lower soil pH. Soil bacteria slowly convert sulfur to sulfuric acid, which drops the pH. Apply in fall for best results. For sandy soil, use about 1 pound per 100 square feet to lower pH by one point. For clay soil, you need roughly double that amount. Always retest after 3 months before applying more. Over-applying sulfur can drop pH too far and create problems in the other direction.
Peat moss: Mixing peat moss into your planting holes or beds adds organic matter that is naturally acidic. It is especially useful for preparing beds for blueberries, rhododendrons, and other acid-loving plants. Work it into the soil at a ratio of about 1 part peat moss to 3 parts native soil. Peat moss also improves water retention, which benefits sandy soils.
Coffee grounds: Used coffee grounds are mildly acidic and make a decent soil amendment for small-scale adjustments. They work best when composted first, then added to the soil. Fresh grounds can be scratched into the top layer of soil around acid-loving plants. The effect is mild, so think of coffee grounds as a supplement rather than a primary pH-lowering tool. Many coffee shops give away used grounds for free if you ask.
Pine needles and oak leaves: When used as mulch, pine needles and oak leaves slowly add acidity to the soil as they decompose. They are a gentle, long-term approach. They will not dramatically lower pH on their own, but combined with sulfur or peat moss, they help maintain acidic conditions once you have achieved them.
The Role of Compost as a pH Buffer
Compost deserves special mention because it does not dramatically raise or lower pH. Instead, it acts as a buffer, helping soil resist pH changes over time. Well-made compost typically has a pH of 6.0 to 7.0, and adding it to your garden improves soil structure, nutrient content, and microbial activity all at once.
If your soil is only slightly off from your target pH, adding generous amounts of compost might be all you need. For more significant pH imbalances, use the amendments above in combination with compost for the best long-term results.
I recommend adding 2 to 3 inches of finished compost to your garden beds once or twice a year. Over time, this builds soil health and creates a stable environment for your plants, reducing the need for pH corrections in the future. Compost also feeds the microbial community that helps regulate pH naturally, creating a positive feedback loop of improving soil health.
Tips for Getting Accurate Results from DIY pH Tests
After using these methods across several gardens over the years, I have learned a few things that make a real difference in getting reliable readings.
Always use distilled water for your tests. Tap water contains minerals and treatment chemicals that can shift your results by half a point or more. A jug of distilled water from the grocery store costs less than a dollar and eliminates this variable entirely.
Clean your containers between tests. If you are testing multiple areas of your garden, rinse your bowls, cups, and tools with distilled water between samples. Cross-contamination from a previous sample is one of the most common causes of inconsistent readings.
Test at the right depth. The surface layer of your soil can have a very different pH than the root zone 6 inches down. Always sample from the depth where your plants’ roots actually grow. For most vegetables, that is 4 to 8 inches below the surface.
Compare results across methods. If you have the time, run two different tests on the same soil sample. If the vinegar test says alkaline and the test strips say pH 7.8, you have confirmation. If the results contradict each other, retake your sample and test again.
Test multiple locations. Soil pH is not uniform across your yard. The area near your house foundation often tests alkaline due to concrete leaching. Areas under conifer trees tend to be more acidic. A single sample from one spot does not represent your entire garden.
Be honest about precision. These DIY methods will not match the accuracy of a professional laboratory soil test. For most home gardeners, knowing whether your soil is acidic, alkaline, or near-neutral is enough to make informed decisions about what to plant and whether to amend. If you are running a commercial operation or growing sensitive specialty crops, send a sample to your local university extension lab for a detailed analysis that includes pH, nutrient levels, and specific amendment recommendations.
Seasonal fluctuations are normal. Soil pH can shift slightly between spring and fall due to biological activity, rainfall, and fertilizer use. A variation of 0.2 to 0.3 pH points between seasons is common and not usually cause for concern. Focus on the overall trend rather than chasing a specific decimal point.
Frequently Asked Questions About Testing Soil pH Without a Meter
How can I test my soil pH level without any device?
The simplest way is the vinegar and baking soda test. Split a soil sample into two bowls. Add white vinegar to one — if it fizzes, your soil is alkaline (above pH 7). Add baking soda and distilled water to the other — if it fizzes, your soil is acidic (below pH 7). If neither fizzes, your soil is near neutral. This method uses common household items and takes about 10 minutes to complete.
How to measure soil pH manually?
You can measure soil pH manually by making a soil slurry with distilled water (1 part soil to 2 parts water), letting it settle for 30 minutes, and dipping a pH test strip into the liquid. Match the strip color to the chart on the packaging for a numerical reading. The red cabbage indicator method is another manual option that produces color changes based on acidity or alkalinity.
How to test pH without a pH meter?
Four reliable methods work without a pH meter: the vinegar and baking soda test for a quick acidic/alkaline reading, pH test strips for a numerical result, the red cabbage juice indicator for a visual color-based test, and visual soil inspection using weed indicators and soil color. Test strips offer the best balance of accuracy and simplicity for most gardeners.
What soil pH do rhododendrons like?
Rhododendrons prefer acidic soil with a pH between 4.5 and 5.5. They are among the most acid-loving common garden shrubs. If your DIY test shows soil above pH 6.0, you will need to lower the pH using elemental sulfur, peat moss, or pine needle mulch before planting rhododendrons. Other acid-lovers in the same family include azaleas, blueberries, and camellias.
Are DIY soil pH tests accurate enough for gardening?
Yes, for most home gardeners, DIY pH tests provide sufficient accuracy. The vinegar and baking soda test reliably indicates whether soil is acidic or alkaline. pH test strips give a numerical reading within about 0.5 points of the actual value. For general vegetable gardening and flower beds, this level of precision is adequate. If you need exact measurements for sensitive crops, send a sample to a university extension soil testing lab.
How often should I test my garden soil pH?
Test your garden soil pH at least once per year, ideally in early spring before planting or in fall after harvest. If you are actively amending your soil with lime, sulfur, or large amounts of compost, retest 3 to 4 months after applying amendments. Container gardens and raised beds should be tested every 4 to 6 months because pH shifts faster in smaller soil volumes.
Can I use pool test strips for soil pH testing?
Pool test strips can work for soil pH testing in a pinch, but they are not ideal. Pool strips are calibrated for water chemistry, not soil. To use them, make a soil slurry with distilled water, let it settle, and test the water portion. The reading may be less accurate than strips designed specifically for soil. Garden-specific pH test strips are inexpensive and give more reliable results.
Wrapping Up: Your Soil pH Testing Plan
Learning how to test soil pH at home without an electronic meter is one of those skills that pays for itself every single season. You do not need a probe with an LCD screen or a battery that dies mid-test. With vinegar, baking soda, a few test strips, or even a head of red cabbage, you can determine whether your soil is acidic, alkaline, or close to neutral.
Here is my recommended approach. Start with the vinegar and baking soda test for a quick baseline. If the result concerns you, follow up with pH test strips for a numerical reading. Use the visual inspection and weed indicator method as ongoing observation throughout the season. And if you ever need precise numbers for a serious project, contact your local university extension office for a professional lab test.
Once you know your pH, use the amendment guidelines in this article to bring your soil into the right range for what you want to grow. Add compost regularly to buffer your soil against future pH swings. Test at least once a year, and more often for containers and raised beds.
Your plants will reward you with stronger growth, better yields, and fewer nutrient deficiency problems. Sometimes the simplest tools really are the most reliable ones.