
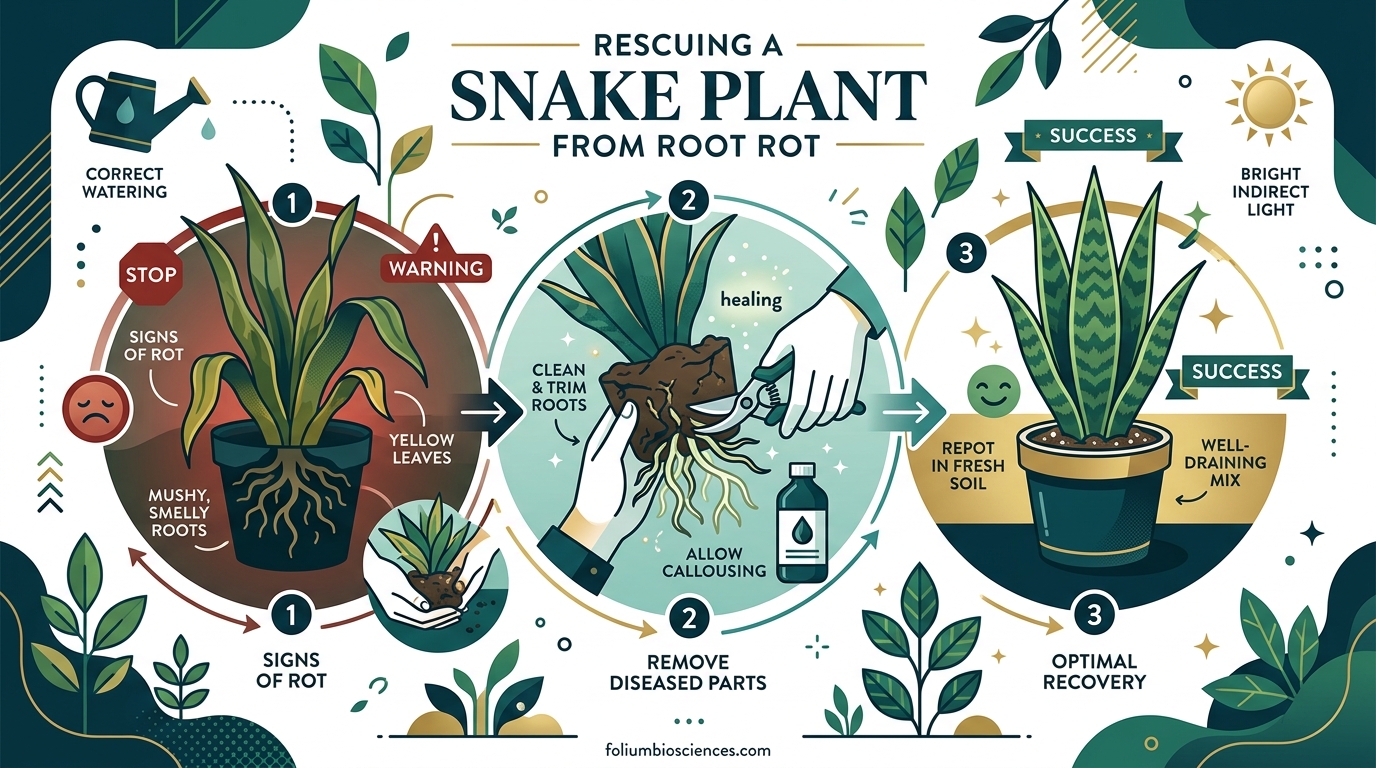
If your snake plant is turning mushy, smelling foul, or drooping like a deflated balloon, root rot is almost certainly the culprit. I have been there myself, watching a once-proud Sansevieria slowly collapse because I loved it with a little too much water. The good news is that snake plants are remarkably tough, and you can often bring them back from the brink if you act quickly.
This guide covers everything you need to know about how to save a snake plant with root rot. I will walk you through identifying the problem, treating it step by step, and preventing it from ever happening again. You will also find a recovery timeline that most articles skip entirely, plus the hydrogen peroxide treatment method that plant owners on forums swear by.
Root rot is the number one killer of snake plants, but it is also one of the most fixable problems if you catch it early. Let us get your plant back on its feet.
Table of Contents
What Is Root Rot in Snake Plants?
Root rot is a fungal disease that attacks a plant’s root system, turning healthy, firm roots into brown, mushy threads that cannot absorb water or nutrients. In snake plants (Sansevieria), it is almost always caused by overwatering combined with soil that stays wet for too long.
When the soil around a snake plant’s roots stays saturated, oxygen gets squeezed out. Without oxygen, the roots begin to suffocate and die. That is when soil-borne fungi move in. The most common pathogens responsible for snake plant root rot include Fusarium, Phytophthora, Pythium, and Rhizoctonia. These fungi are naturally present in most potting soils, but they only become a problem when conditions are constantly wet.
Snake plants are especially vulnerable to root rot because they evolved as drought-resistant desert plants. Their thick, fleshy leaves store water for long dry spells, which means they need far less frequent watering than most houseplants. A watering schedule that would be perfect for a fern or a peace lily can be lethal for a snake plant. Their roots are simply not built to sit in moisture for extended periods.
The irony is that the very thing that makes snake plants so popular, their low-maintenance reputation, is what gets them into trouble. Owners assume “low maintenance” means “impossible to kill,” pour on the water, and end up creating the perfect environment for fungal root rot to thrive.
How to Identify Snake Plant Root Rot
Catching root rot early makes a huge difference in your plant’s chances of survival. Here are the signs to look for, starting with the most obvious.
Above-Ground Symptoms
The first thing most people notice is mushy, soft leaves. Healthy snake plant leaves should feel firm and rigid, almost like thick leather. If they feel squishy or leave a dent when you press them, rot has likely spread from the roots into the foliage.
Yellowing or browning leaves that start at the base and work their way up are another red flag. A single yellow leaf here and there is normal, but multiple leaves changing color at once, especially from the bottom up, points to a root problem.
Leaves that droop, lean, or fall over are a late-stage sign. The root system can no longer support the plant’s structure. If your snake plant looks like it is wilting even though the soil is wet, root rot is the most likely explanation.
You might also notice a foul, sulfur-like smell coming from the soil. That odor is the smell of decomposing roots and bacterial activity. One plant owner on Reddit described it as “the worst smell I have ever encountered from a houseplant.” If you can smell it, the rot has been progressing for a while.
Below-Ground Symptoms
To confirm root rot, you need to look at the roots themselves. Gently slide the plant out of its pot and examine the root ball.
Healthy roots are firm, white or light orange, and have a clean, earthy smell. They should resist gentle tugging.
Rotting roots are brown or black, soft and mushy, and may fall apart when you touch them. They often have a slimy texture and that same foul odor you noticed from the soil. In severe cases, the root ball may be mostly or entirely decomposed, leaving behind dark, wet sludge.
If more than half the roots are rotted, saving the original root system is unlikely. But even then, snake plants can be propagated from healthy leaf cuttings, so all hope is not lost.
How to Save a Snake Plant with Root Rot: Step-by-Step Recovery
This is the process I have used to rescue overwatered snake plants, and it is the same method recommended by plant care communities and horticultural experts. Follow each step carefully, and do not skip the drying phase, no matter how eager you are to repot.
Step 1: Remove the Plant from Its Pot
Gently tip the pot on its side and slide the plant out. Do not yank it by the leaves. If the root ball is stuck, run a butter knife around the inside edge of the pot to loosen it. You need to see the full root system to assess the damage.
Step 2: Wash Away the Old Soil
Rinse the roots under lukewarm running water to remove all the old potting soil. This does two things: it lets you see every root clearly, and it washes away fungal spores and bacteria living in the contaminated soil. Use your fingers to gently work through the root ball and break apart compacted sections.
Step 3: Inspect and Assess
Now look at what you are working with. Identify which roots are healthy (firm, white or orange) and which are rotted (brown, black, mushy). Be honest with yourself. Any root that is even slightly soft or discolored needs to go, because the fungus will continue spreading from those roots to the healthy ones.
Step 4: Trim Away All Rotted Roots and Leaves
Using clean, sharp scissors or pruning shears (wipe them with rubbing alcohol first), cut away every rotted root. Cut slightly into the healthy tissue above the rot to be safe. Remove any leaves that are mushy, heavily discolored, or pulling away from the base. Discard all the trimmed material in the trash, not your compost pile.
Step 5: Treat with Hydrogen Peroxide
This is the step that most traditional gardening guides skip, but plant owners on forums consistently report success with it. Mix a solution of one part 3% hydrogen peroxide to two parts water. Dip or spray the remaining roots thoroughly. The peroxide kills fungal spores and bacteria on contact, and it also delivers a burst of oxygen to damaged root tissue.
Let the treated roots sit for about 10 minutes. You may see slight fizzing, which is completely normal. That is the peroxide oxidizing and doing its job.
Step 6: Let the Plant Callus and Dry
Place the plant on a clean surface (a sheet of newspaper or paper towels works well) and let it air dry for 1 to 3 days. The cut ends of the roots need to form a callus before going back into soil. Skipping this step is one of the most common mistakes people make. Putting wet, freshly cut roots straight into damp soil invites the same rot you just removed.
Step 7: Prepare the Right Soil Mix
Here is where the Reddit community’s advice really matters. A user on r/plantclinic who successfully rescued their snake plant recommended a mix that is about 60% chunky material (perlite, pumice, or coarse orchid bark) and 40% potting soil. You can also use a commercial cactus and succulent mix and amend it with extra perlite.
The goal is a soil that water flows through quickly. When you water, it should drain out the bottom within seconds, not sit in the pot for days. Regular houseplant potting soil retains too much moisture for snake plants, especially ones recovering from root rot.
Step 8: Repot in a Clean Container
If you are reusing the same pot, wash it thoroughly with a bleach solution (one part bleach to nine parts water) and rinse it well. Better yet, use a new pot. Either way, make absolutely sure the container has drainage holes. Without drainage, no amount of careful watering will prevent root rot from returning.
Fill the pot partway with your prepared soil mix, position the plant, and fill in around the roots. Do not pack the soil down firmly. Snake plant roots prefer loose, aerated soil. Water lightly, just enough to settle the soil around the roots. Then wait.
Snake Plant Root Rot Recovery Timeline
One of the most frustrating things about treating root rot is the waiting. You do the work, repot the plant, and then nothing seems to happen for weeks. Here is what to expect based on the typical recovery trajectory.
Days 1 to 7: The plant is in shock. It may look worse before it looks better. Leaves might continue to yellow or droop as the plant redirects energy toward root regeneration. Keep it in bright, indirect light and resist the urge to water.
Weeks 2 to 4: If the recovery is on track, you should start seeing small white nubs of new root growth emerging from the base of the plant. These are the first signs that your snake plant is rebuilding its root system. The soil should be kept barely moist, not wet. A light misting or a few tablespoons of water is enough.
Months 2 to 3: New roots should be establishing themselves throughout the pot. You might see a new leaf pushing up from the soil, which is the best possible sign. At this point, you can begin a more regular but still conservative watering routine.
Month 4 and beyond: The plant is largely recovered and should be treated as a normal snake plant again. Resume a proper watering schedule based on soil dryness, not a calendar.
Factors that can speed up or slow down recovery include the severity of the original rot, the amount of healthy root tissue remaining, light levels, temperature, and humidity. Plants kept in warmer conditions (65 to 80 degrees Fahrenheit) with bright indirect light tend to recover fastest.
How to Prevent Root Rot in Snake Plants
Prevention is far easier than treatment. Once you have gone through the recovery process once, you will not want to repeat it. These are the practices that keep snake plants healthy year after year.
Water the Right Way
The single most important rule: water only when the soil is completely dry. For most indoor environments, that means every 2 to 4 weeks in spring and summer, and every 4 to 6 weeks (or longer) in fall and winter. Snake plants can go months without water. One Reddit user put it plainly: “Snake plants can go months without water!” When in doubt, wait another week.
Always check the soil before watering. Stick your finger two inches into the pot. If you feel any moisture at all, walk away. A moisture meter can also help if you are unsure.
Use the Right Soil
As mentioned earlier, snake plants need a well-draining soil mix. A commercial cactus and succulent blend is a good starting point. To make it even better, mix in extra perlite or pumice until the soil looks like it has more chunks than fine particles. The chunkier the mix, the faster water drains through, and the less likely root rot becomes.
Choose the Right Pot
Always use a container with at least one drainage hole. This is non-negotiable. Terracotta pots are an excellent choice for snake plants because the clay absorbs excess moisture from the soil, helping it dry out faster between waterings. Avoid pots without drainage holes, decorative cache pots that trap water, and containers that are much larger than the plant’s root ball, since excess soil holds excess moisture.
Never Leave Standing Water
After watering, empty any water that collects in the saucer beneath the pot within 30 minutes. Allowing water to sit means the soil continuously reabsorbs it from the bottom, keeping the lower root zone perpetually wet. This is a fast track to root rot even with the best soil mix.
Post-Treatment Care and Monitoring
After you have repotted your recovering snake plant, the care routine changes from treatment mode to monitoring mode. Here is how to support the plant through the weeks and months ahead.
Watering: For the first two weeks after repotting, do not water at all. The plant has minimal roots and cannot absorb much. After that, water only when the top two inches of soil are bone dry. A few tablespoons of water around the base is plenty for a recovering plant. Overwatering during recovery is the most common reason treated plants die anyway.
Light: Place the plant in bright, indirect light. Avoid direct sunlight, which can stress an already weakened plant. A spot near an east or north-facing window is ideal. Too little light slows recovery; too much sun scorches vulnerable leaves.
Fertilizer: Do not fertilize a recovering snake plant. Fertilizer salts can burn damaged roots and set back the healing process. Wait until the plant shows clear signs of new growth (a new leaf or well-established roots), and even then, use a diluted half-strength fertilizer at most.
Monitoring signs: Watch for firm, upright new growth as a positive signal. New white roots at the base are the clearest indicator of recovery. On the other hand, continuing mushiness, spreading yellowing, or a return of the foul odor means the rot was not fully removed. In that case, you may need to repeat the treatment process or try propagating from any remaining healthy leaf sections.
When to give up: If after two months there is no sign of new root growth, the leaves continue to deteriorate, and the plant has no firm tissue left at the base, it may be time to let it go. But snake plants are survivors. I have seen plants bounce back from what looked like total loss, so give it a real chance before making that call.
FAQ
Can snake plants recover from root rot?
Yes, snake plants can recover from root rot if you catch it early enough and remove all affected roots. Trim away every mushy, brown, or black root, treat the remaining roots with hydrogen peroxide, let the plant dry for 1-3 days, and repot in fresh, well-draining soil. Snake plants are extremely resilient and can regrow their entire root system from even a small amount of healthy tissue. The key is acting quickly and not returning to overwatering habits.
How to bring a snake plant back to life?
To bring a dying snake plant back to life, first identify whether the problem is root rot from overwatering (most common) or damage from underwatering. For root rot: remove the plant from its pot, wash away old soil, trim all rotted roots and mushy leaves, treat with a hydrogen peroxide solution, let it dry for 1-3 days, and repot in a chunky, well-draining soil mix in a pot with drainage holes. Water sparingly and keep in bright indirect light during recovery.
Does hydrogen peroxide help root rot?
Yes, hydrogen peroxide is an effective treatment for root rot. A solution of one part 3% hydrogen peroxide to two parts water kills fungal spores and bacteria on contact while delivering oxygen to damaged root tissue. After trimming away rotted roots, soak or spray the remaining healthy roots with this solution for about 10 minutes before letting the plant dry and repotting. Plant owners on forums consistently report successful recoveries using this method.
Do coffee grounds help a snake plant?
Coffee grounds are not recommended for snake plants. While they add some organic matter to soil, coffee grounds retain moisture and can make the soil too acidic, both of which increase the risk of root rot. Snake plants prefer alkaline to neutral soil and need excellent drainage. Instead of coffee grounds, amend your soil with perlite, pumice, or coarse sand to improve aeration and drainage.
Final Thoughts on Saving Your Snake Plant
Learning how to save a snake plant with root rot comes down to a straightforward process: remove, clean, trim, treat, dry, and repot. The eight steps in this guide are the same ones used by plant care professionals and hobbyists who have rescued thousands of snake plants between them. The hydrogen peroxide treatment and the 60% chunky soil mix ratio are techniques that real plant owners have validated through hands-on experience.
Snake plants are survivors. They evolved to endure long droughts, harsh light, and neglect. That same toughness is what makes them capable of bouncing back from root rot, even when things look dire. Give your plant a real chance by following every step, being patient through the recovery timeline, and resisting the urge to overwater once it is back in soil.
The best treatment for root rot is prevention. Water only when the soil is dry, use a chunky, well-draining mix, and always plant in containers with drainage holes. Do those three things consistently, and your snake plant will outlast most of the furniture in your home.