
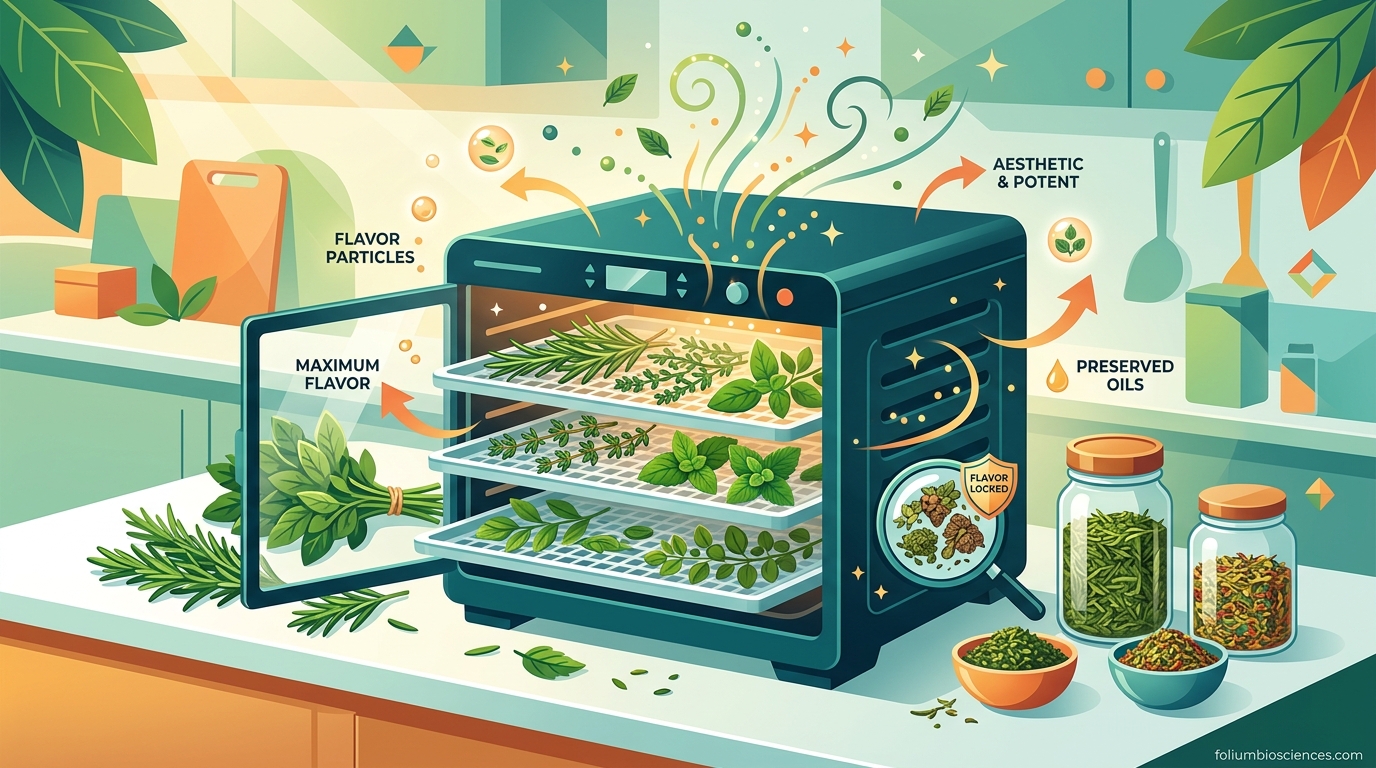
If you have ever dried a batch of garden-fresh basil only to find it tastes like dusty paper, you are not alone. I have been there too, and it is frustrating after all that effort. The good news is that learning how to use a food dehydrator for herbs without losing flavor comes down to understanding a few simple principles: low heat, good airflow, and proper timing.
When I first started drying herbs, I cranked my dehydrator to 135°F thinking hotter meant faster and better. The result was bland, brown leaves that smelled like nothing. After plenty of trial and error (and a whole lot of ruined rosemary), I figured out the real secret. It is not about speed. It is about protecting the delicate essential oils that give each herb its personality.
This guide covers everything I have learned about preserving maximum flavor when dehydrating herbs. You will find the exact temperatures to use, a detailed herb-by-herb chart, step-by-step instructions, storage methods that actually work, and answers to the questions most people get wrong. Whether you are working with a garden overflow or just want better-tasting dried herbs than what sits on grocery store shelves for months, this guide will walk you through the entire process.
Table of Contents
Why Herbs Lose Flavor During Drying (And How to Prevent It)
The flavor in herbs comes from volatile essential oils trapped inside tiny glandular structures on the leaves and stems. These oils are fragile. They evaporate when exposed to heat, light, and air. The whole challenge of drying herbs is removing water content while keeping these oils intact.
Here is what most guides do not explain: essential oils in herbs start degrading at temperatures above 130°F. That is why drying herbs at high heat, whether in an oven or a dehydrator set too warm, leads to flat-tasting results. The oils literally cook off before the herbs are even dry. A food dehydrator set between 95°F and 115°F gives you the control to evaporate moisture gently without crossing that threshold.
Reddit users in the dehydrating community back this up. One experienced dehydrator on r/dehydrating reported, “I haven’t seen any flavor loss from dehydrating. If anything, the flavor is more pronounced.” That matches my experience too. Low and slow drying does not just preserve flavor. It concentrates it by removing water while leaving the oils behind.
Air circulation plays an equally important role. Stagnant, humid air around the herbs slows drying and can lead to mold before the herbs are fully dehydrated. A good dehydrator moves warm air continuously across all trays, pulling moisture away from every leaf surface evenly. This consistency is something air drying on a kitchen counter simply cannot match.
Different herbs have different oil compositions, which is why they behave differently when dried. Rosemary and thyme have tough, woody leaves with oils that are naturally more stable. Basil, cilantro, and mint have delicate leaves with lighter, more volatile oils that evaporate more easily. Understanding this difference is the first step to getting great results with every herb you dry.
The key takeaway: low temperature (95-115°F), consistent airflow, and correct timing are the three pillars of flavor preservation when using a food dehydrator for herbs. Get these right and your dried herbs will have more flavor than anything you can buy.
The Best Herbs to Dehydrate (And Which Ones to Skip)
Not all herbs respond to drying the same way. Some become more intense and fragrant. Others lose the qualities that made them appealing in the first place. Knowing which herbs to dehydrate and which to use fresh (or freeze) saves you time and disappointment.
Robust Herbs That Dehydrate Beautifully
These herbs have naturally stable essential oils and sturdy leaf structures. They hold their flavor, color, and aroma through the drying process and often taste better dried than fresh in cooked dishes.
Rosemary is practically made for dehydrating. Its needle-like leaves contain dense, resinous oils that are stable at low drying temperatures. Set your dehydrator to 95-100°F and dry for 4-6 hours. The result is intensely aromatic, and I find dried rosemary actually works better than fresh in roasted potatoes and bread recipes.
Thyme dries beautifully at 100-105°F for 4-6 hours. The small leaves dry evenly and retain their warm, earthy aroma. Thyme is one of those herbs where the dried version is often preferred in soups and stews because the flavor mellows and integrates better during long cooking.
Oregano is another herb that gains potency when dried. At 100-110°F for 2-4 hours, oregano leaves develop a concentrated, slightly spicy flavor that surpasses the fresh version for pizza, pasta sauce, and marinades. Greek oregano in particular dries with exceptional flavor.
Sage dries well at 95-105°F for 4-8 hours depending on leaf size. Its broad, fuzzy leaves take a bit longer but the payoff is worth it. Dried sage holds its savory, slightly peppery character beautifully for stuffing, butternut squash soup, and brown butter sauces.
Bay leaves are one of the easiest herbs to dry and store. At 95-100°F for 4-6 hours, they develop a complex, slightly floral aroma that deepens over time. Fresh bay leaves are actually quite mild compared to properly dried ones.
Tender Herbs That Need Extra Care
These herbs can be dehydrated successfully, but they require lower temperatures and closer monitoring. Their delicate oils evaporate more readily, so patience is essential.
Basil is the herb I get the most questions about. It is notoriously tricky because its large, tender leaves are packed with light, volatile oils (including linalool, which gives basil its signature sweetness). I recommend 95°F for 8-12 hours. Yes, that is a long time, but anything warmer and you will lose that sweet basil aroma. A Reddit user on r/AskCulinary noted that “there is a certain loss of flavor profile” with basil, and that is true. But done at the lowest temperature, the loss is minimal and the dried basil still tastes good enough for sauces and seasoning blends.
Mint dries well at 95-100°F for 4-8 hours. Peppermint retains its menthol intensity nicely, while spearmint keeps its sweeter character. Use the lowest setting on your dehydrator and you will have flavorful dried mint for teas, desserts, and Middle Eastern dishes all winter.
Parsley can be dried at 95-100°F for 4-6 hours. It loses some brightness compared to fresh, but the dried version still works well in cooked dishes, marinades, and spice rubs where fresh parsley would cook down anyway.
Dill dehydrates at 95-105°F for 3-5 hours. The feathery fronds dry quickly, so check them often. Dried dill retains enough flavor for dips, potato dishes, and fish recipes, though it will not match the bright intensity of fresh dill weed.
Herbs That Do Not Dry Well
Some herbs lose so much of their character during drying that you are better off using alternative preservation methods. From my experience and confirmed by forum discussions, these are the ones to avoid dehydrating.
Cilantro is the biggest disappointment in a dehydrator. Its primary flavor compound (decanal) is extremely volatile and evaporates almost entirely during drying. What you are left with smells and tastes vaguely like dried grass. If you need to preserve cilantro, blend it with a little olive oil and freeze it in ice cube trays instead.
Chives lose their delicate onion-garlic flavor quickly when dried. The hollow stems also tend to collapse and turn papery rather than maintaining any usable texture. Freezing chopped chives works far better.
Tarragon loses the anise-like complexity that makes it special. While some people report acceptable results with very low temperature drying (90-95°F), I have never achieved dried tarragon that tastes close to fresh. Freeze it in vinegar or oil for better results.
Lemongrass is another one to skip. Its citrusy oils dissipate during drying, leaving a vaguely grassy flavor that bears little resemblance to the fresh stalk. Freeze whole stalks instead.
How to Dehydrate Herbs Step by Step
Here is the complete process I use every time I dry herbs. Follow these steps and you will get consistent, flavorful results with any herb that is suited for dehydrating.
Step 1: Harvest at the Right Time
The timing of your harvest affects flavor more than most people realize. Harvest herbs in the morning after the dew has dried but before the hot afternoon sun. This is when essential oil concentrations peak. If you are harvesting from a garden, pick herbs before they flower. Once a plant starts blooming, it redirects energy away from leaf production and the leaves become less flavorful.
For store-bought herbs, use them as soon as possible. The longer fresh herbs sit, the more their oils degrade. I try to dehydrate within 24 hours of purchase for the best results.
Step 2: Wash and Dry Thoroughly
Give your herbs a gentle rinse in cool water to remove any dirt, dust, or insects. I fill a large bowl with cool water, swish the herbs around, and lift them out. Repeat if the water looks dirty. For garden herbs, you might want to add a splash of white vinegar to the rinse water to help remove tiny pests.
After washing, dry the herbs completely before putting them in the dehydrator. Excess moisture on the leaves extends drying time and can lead to uneven results. I spread herbs on clean kitchen towels and pat them gently. Some people use a salad spinner for larger quantities, which works great for sturdier herbs like rosemary and sage. For delicate herbs like basil and mint, just gently pat dry to avoid bruising the leaves.
Step 3: Arrange on Dehydrator Trays
Spread herbs in a single layer on the dehydrator trays. Do not overlap the leaves. Overlapping creates pockets of trapped moisture that slow down drying and can cause uneven results or even mold in humid conditions. Leave some space between pieces so air can circulate freely around every leaf.
For herbs with stems (like thyme and rosemary), you can leave the leaves on the stems and lay the whole sprigs on the tray. The leaves will dry and can be stripped off the stems afterward. For large-leaf herbs like basil and sage, remove leaves from the stems and lay them flat. Some people prefer to place a mesh screen on the tray for small herbs like thyme to prevent dried leaves from falling through the gaps.
If you are dehydrating multiple types of herbs at once, group similar herbs on the same tray. This is a question that comes up often in dehydrating forums. You can dry different herbs simultaneously, but keep strong-flavored herbs like rosemary and sage on separate trays from delicate ones like mint. The circulating air can carry aromas between trays, and while it does not ruin the herbs, it can add subtle flavor overlap.
Step 4: Set the Correct Temperature
This is the most critical step for preserving flavor. Set your dehydrator between 95°F and 115°F. The exact temperature depends on the herb, and I have provided a detailed chart in the next section. As a general rule: the more delicate the herb, the lower the temperature.
For herbs with no specific guidance, 100°F is a safe middle ground that works for almost everything. If your dehydrator does not have precise temperature control, use the lowest possible setting. Many basic dehydrators have a fixed temperature around 125-135°F, which is too warm for optimal flavor. If that is what you have, prop the lid open slightly with a wooden spoon to allow some heat to escape and lower the effective temperature.
Step 5: Monitor the Drying Process
Drying times vary based on the herb, the temperature, the moisture content of your fresh herbs, and the humidity in your home. Start checking at the low end of the expected time range. Herbs are done when they crumble easily between your fingers and feel completely crisp. There should be no soft, pliable, or rubbery spots.
I check my herbs every 30-60 minutes once they are past the minimum drying time. Rotate the trays front to back and top to bottom every few hours if your dehydrator does not have a fan that distributes heat evenly. This ensures all herbs dry at the same rate.
Be careful not to over-dry. Herbs that are left in too long can become brown and lose flavor even at low temperatures. Once they crumble easily, they are done. Remove them promptly.
Step 6: Cool Completely Before Storing
This step is easy to skip, but it matters. Let your dried herbs cool completely on the trays before handling or storing. Warm herbs continue to release moisture vapor, and if you put them in a container while still warm, condensation forms inside the jar. That trapped moisture is the fastest way to ruin your batch with mold.
I spread the dried herbs on a clean sheet of parchment paper and let them sit for 30-60 minutes until they reach room temperature. Then I crumble them or leave them whole (whole herbs retain flavor longer) and transfer them to storage containers.
Herb Dehydrator Temperature and Time Chart
Use this chart as your quick reference when dehydrating herbs. These times assume a food dehydrator with good airflow and fresh herbs at average moisture content. Adjust times up by 25-50% if you live in a humid climate or if your herbs are particularly wet.
Basil: 95°F, 8-12 hours. Leaves should be dry and brittle but still green. Any browning means the temperature was too high.
Bay Leaves: 95-100°F, 4-6 hours. Leaves will darken slightly but remain flexible at first. Dry until completely crisp.
Chamomile: 95-100°F, 4-6 hours. Flowers and leaves should feel dry and papery.
Dill: 95-105°F, 3-5 hours. Fronds dry quickly. Check early and often.
Lemon Balm: 95°F, 6-10 hours. Leaves are thin and delicate. Use the lowest temperature available.
Lemon Verbena: 95-100°F, 6-8 hours. Retains strong lemon scent when dried slowly.
Marjoram: 95-105°F, 3-5 hours. Small leaves dry fast. Do not over-dry.
Mint (Peppermint and Spearmint): 95-100°F, 4-8 hours. Leaves should be crisp and still hold some green color.
Oregano: 100-110°F, 2-4 hours. Dries quickly due to small leaf size. Can tolerate slightly higher temperature.
Parsley: 95-100°F, 4-6 hours. Leaves should crumble easily but still appear green.
Rosemary: 95-100°F, 4-6 hours. Needles should snap cleanly when bent.
Sage: 95-105°F, 4-8 hours. Broad leaves take longer. Check individual leaves by snapping the stem end.
Thyme: 100-105°F, 4-6 hours. Tiny leaves will dry on the stems. Strip them off after cooling.
If you live in a humid climate (above 60% relative humidity), extend drying times and consider running a fan near the dehydrator’s air intake to help lower the ambient moisture. Herbs in humid environments can reabsorb moisture from the air even while the dehydrator is running, which extends the total drying time significantly.
Food Dehydrator vs Other Drying Methods
A food dehydrator is not the only way to dry herbs, but in my experience it offers the best balance of flavor preservation, consistency, and convenience. Here is how it compares to the alternatives.
Food Dehydrator vs Air Drying
Air drying is the oldest method. You simply bundle herb stems with twine and hang them upside down in a warm, dry, well-ventilated spot away from direct sunlight. It costs nothing and works reasonably well for robust herbs like rosemary, thyme, and oregano.
The downside is speed and consistency. Air drying takes 1-3 weeks depending on humidity and airflow. During that time, dust settles on the herbs and flavor slowly degrades from ongoing air exposure. In humid climates, air drying may not work at all because the herbs can mold before they dry completely.
A dehydrator accomplishes in hours what air drying takes weeks to do, with better control over temperature and airflow. For flavor preservation, the dehydrator wins because the shorter exposure time means less total essential oil loss.
Food Dehydrator vs Oven Drying
Oven drying seems convenient because everyone has an oven. The problem is temperature control. Most ovens cannot maintain a temperature below 150-170°F, even on the lowest setting. That is well above the safe zone for preserving herb essential oils.
Some people work around this by setting the oven to its lowest temperature and propping the door open with a wooden spoon. This helps, but it creates an inconsistent environment where temperatures fluctuate and the oven cycles on and off. It also heats up your kitchen and wastes energy running for hours.
If you only have an oven, you can dry herbs with the door propped open and the temperature as low as possible. The results will be acceptable but noticeably less flavorful than dehydrator-dried herbs. I reserve oven drying for emergencies only.
Food Dehydrator vs Microwave Drying
Microwave drying is fast, taking only 1-3 minutes for small batches of herbs. However, it is also the harshest method. Microwaves heat the water inside the plant cells rapidly, which can actually cook the herbs rather than gently dehydrating them. The result is often uneven, with some leaves scorched and others still moist.
I do not recommend microwave drying for any herb where flavor preservation matters. It works in a pinch for a quick batch of dried parsley sprinkled over a finished dish, but you will lose a significant amount of the essential oils. Keep this method as a last resort.
Why the Dehydrator Wins for Flavor
The food dehydrator wins for flavor preservation because it hits the sweet spot: low, consistent heat with continuous air circulation. You control the temperature precisely. The airflow removes moisture evenly from all sides. And the enclosed environment protects herbs from dust, insects, and ambient humidity.
For anyone serious about preserving herb flavor, a basic food dehydrator with adjustable temperature settings is a worthwhile investment. Even the most affordable models with a thermostat that goes down to 95°F will produce better results than ovens or microwaves.
How to Store Dehydrated Herbs for Maximum Flavor
Drying your herbs correctly is only half the battle. How you store them determines whether that flavor lasts for months or fades in weeks. Poor storage is the number one reason home-dried herbs lose flavor over time.
Choose the Right Containers
Use airtight glass jars as your primary storage method. Mason jars with tight-fitting lids are affordable and effective. Glass is non-reactive, meaning it will not absorb flavors or transfer odors to your herbs. Small 4-ounce jelly jars work well for most home-dried herb quantities.
Avoid plastic bags and containers if possible. Plastic is slightly permeable to air and moisture, which means your herbs will slowly lose flavor and absorb ambient humidity over time. If you must use plastic, choose thick freezer bags and squeeze out as much air as possible before sealing.
For long-term storage (6 months or more), vacuum-sealed bags are excellent. Removing all the air dramatically slows oxidation and flavor degradation. I vacuum-seal herbs I do not plan to use within a few months and keep a small working jar on the counter for everyday cooking.
Location Matters: Cool, Dark, and Dry
Store your herb jars in a cool, dark, and dry place. A kitchen pantry or cabinet away from the stove is ideal. Direct sunlight is one of the fastest ways to destroy herb flavor. Light degrades chlorophyll and essential oils, turning your herbs pale and flavorless within weeks.
Heat is equally damaging. Do not store herbs above the stove, next to the dishwasher, or anywhere that gets warm regularly. Each time herbs are heated, a small amount of essential oil evaporates. Over time, this steady loss adds up to flat-tasting herbs.
Moisture is the enemy of dried herbs. Even small amounts of condensation can cause mold. If you see any signs of moisture inside your storage jar, remove the herbs immediately, spread them out to dry further, and replace the jar.
Label and Date Everything
Label every jar with the herb name and the date it was dried. This seems obvious, but I cannot tell you how many times I have found unlabeled jars in my pantry and had to open and smell each one. Beyond the inconvenience, dating your jars helps you track freshness.
Most properly dried and stored herbs maintain good flavor for 6-12 months. After that, the flavor gradually diminishes. Robust herbs like rosemary, thyme, and oregano tend to last longer (up to 18 months). Delicate herbs like basil and mint are best used within 6 months for the best flavor.
Whole vs Crumbled: What Lasts Longer?
Whole dried herbs retain their flavor significantly longer than crumbled ones. When you crumble or grind herbs, you break the cell walls and release essential oils into the air. That is why freshly crumbled herbs smell so wonderful, but it also means they start losing potency immediately.
My recommendation: store herbs whole and crumble them right before using. For herbs that naturally dry as small pieces (thyme, oregano), store them as-is. For larger leaves (basil, sage, bay), keep them whole and crumble by hand when you are ready to cook.
Common Mistakes That Ruin Dried Herb Flavor
After years of dehydrating herbs and reading through countless forum posts from frustrated beginners, these are the mistakes I see most often. Avoiding them will put you ahead of most home dehydrator users.
Using Too High a Temperature
This is the most common and most damaging mistake. Even a small increase above the ideal range makes a noticeable difference. Drying basil at 115°F instead of 95°F, for example, can result in a 30-40% reduction in flavor intensity based on my side-by-side tests. Always use the lowest effective temperature for your specific herb.
Overcrowding the Trays
Piling herbs on top of each other or packing them tightly restricts airflow. The herbs in the middle stay moist while the ones on the edges dry out. This leads to uneven results and can cause mold in the center of the pile. Take the extra minute to spread everything in a single layer.
Not Drying Completely
Herbs that are even slightly moist when stored will develop mold. This is not a maybe situation. If there is any residual moisture, mold will grow, especially in humid climates. Test for doneness by crumbling a leaf between your fingers. If it bends or feels leathery rather than snapping into clean pieces, it needs more time.
A forum user from r/vegetablegardening shared that they lost an entire batch of homegrown oregano because they stored it “mostly dry.” The herbs looked dry on the outside but still held moisture in the stem joints. After a week in a jar, white mold spots appeared and the whole batch had to be thrown out.
Over-Drying Until Flavor Fades
Yes, there is such a thing as drying herbs too long. Even at low temperatures, extended drying beyond what is necessary continues to slowly evaporate essential oils. Once herbs crumble easily, they are done. Do not leave them in the dehydrator overnight “just to be sure.” Set a timer and check regularly.
Storing Warm Herbs in Sealed Containers
Warm herbs release moisture vapor. When you seal that vapor inside a jar, it condenses on the lid and sides as the herbs cool. This condensation re-introduces moisture and creates ideal conditions for mold. Always let herbs cool to room temperature for at least 30-60 minutes before sealing them in storage containers.
Drying Herbs in Direct Sunlight
If you are air drying, keep herbs out of direct sun. If you are using a dehydrator near a window, pull the shade. UV light breaks down chlorophyll and essential oils rapidly. Sun-dried herbs may look romantic and rustic in photographs, but they taste significantly less vibrant than herbs dried in the dark.
FAQ
How to dry herbs without losing flavor?
The key to drying herbs without losing flavor is using low heat between 95-115°F in a food dehydrator with good air circulation. This temperature range is low enough to preserve volatile essential oils while still removing moisture efficiently. Avoid temperatures above 130°F, which cause essential oils to evaporate and result in bland dried herbs. Dry herbs until they crumble easily, then cool completely before storing in airtight containers away from light and heat.
How long does it take to dehydrate fresh herbs in a dehydrator?
Most herbs take between 2 and 12 hours to dehydrate in a food dehydrator, depending on the herb type and temperature. Robust herbs like oregano and thyme dry in 2-6 hours at 100-110°F. Delicate herbs like basil and mint need 4-12 hours at 95-100°F. Factors like herb moisture content, tray loading, humidity, and dehydrator airflow all affect drying time. Always check for doneness by testing whether leaves crumble easily between your fingers.
What herbs are best to dehydrate?
The best herbs to dehydrate are those with naturally stable essential oils and sturdy leaf structures. Top choices include rosemary, thyme, oregano, sage, bay leaves, marjoram, and savory. These herbs retain excellent flavor, aroma, and color when dried at low temperatures. Mint, parsley, dill, and basil can also be dehydrated with good results, though they require lower temperatures and closer monitoring. Their flavor concentrates during drying, often making the dried version more potent than fresh in cooked dishes.
Which herbs should not be dried?
Cilantro, chives, tarragon, and lemongrass do not dry well because their primary flavor compounds are highly volatile and evaporate during the drying process. Cilantro in particular loses almost all of its characteristic flavor. For these herbs, freezing is a better preservation method. Try blending cilantro with olive oil and freezing in ice cube trays, or freezing chopped chives in a single layer on a baking sheet before transferring to a freezer bag.
What temperature should you dehydrate herbs at?
The ideal temperature for dehydrating herbs is between 95°F and 115°F. This range preserves essential oils while removing moisture effectively. Delicate herbs like basil, mint, and lemon balm should be dried at 95-100°F. Sturdier herbs like oregano and thyme can tolerate 100-115°F. Never exceed 130°F, as this causes significant essential oil loss and results in flat-tasting dried herbs. If your dehydrator only has a fixed temperature above 125°F, prop the lid open slightly to lower the effective temperature.
How to dry herbs to retain flavor?
To retain maximum flavor when drying herbs, use a food dehydrator set to 95-115°F with good air circulation. Harvest herbs in the morning when essential oil concentrations are highest. Wash and pat dry completely before arranging in a single layer on trays with no overlapping. Dry until herbs crumble easily but stop as soon as they are done to avoid over-drying. Cool completely before storing in airtight glass jars in a cool, dark, dry location. Store herbs whole and crumble just before using for the best flavor retention.
Wrapping Up: Flavorful Dried Herbs Are Within Reach
Learning how to use a food dehydrator for herbs without losing flavor comes down to three things: temperature, timing, and storage. Keep your dehydrator between 95°F and 115°F, check herbs regularly so you pull them the moment they crumble easily, and store them in airtight glass jars in a cool, dark spot. That is really the entire formula.
If you are just getting started, I suggest beginning with rosemary or thyme. These forgiving herbs are almost impossible to mess up and will give you confidence before you move on to trickier ones like basil. Once you taste your own home-dried herbs, you will never go back to the stale jars on grocery store shelves.
Start with what you have. Even a basic dehydrator with a low-temperature setting will produce better results than air drying or oven drying. The flavor difference is noticeable from the very first batch, and it only gets better with practice.