
If you have ever bought a bunch of fresh basil from the grocery store, used two leaves, and watched the rest turn to slime in your fridge, you already know why an indoor herb garden makes so much sense. Now imagine having those herbs growing right on your kitchen counter, ready to snip whenever you need them, even if your entire kitchen could fit inside a closet.
I have been growing herbs indoors for years, and I have made just about every mistake possible. Overwatered basil, leggy cilantro, mint that took over my entire windowsill. Through trial and error, I figured out what actually works when you are working with a tiny kitchen counter and not much else. This guide covers the best indoor herb garden setup for a tiny kitchen counter, from picking the right herbs to keeping them alive week after week.
Whether you are in a studio apartment, a rental with zero outdoor space, or just a kitchen where counter real estate comes at a premium, you will find practical, tested advice here. I am going to walk you through exactly what to grow, what equipment you need (and what you do not), and how to build a system that fits your space and your cooking habits.
Table of Contents
Why an Indoor Herb Garden Makes Sense for Tiny Kitchens
Fresh herbs transform a meal. A few leaves of basil on a tomato sandwich, a sprinkle of chives on scrambled eggs, or a handful of cilantro in a bowl of soup can take something basic and make it genuinely good. The problem is that store-bought herbs come in big plastic clamshells, cost three to five dollars a pop, and rarely last more than a few days before wilting.
Growing your own solves that waste problem completely. You harvest only what you need, when you need it. Over the course of a year, a small indoor herb garden can save you serious money, especially if you cook with herbs regularly. One Reddit user in r/Cooking tracked their spending and found they saved over $200 in a year by growing basil, mint, and thyme instead of buying them weekly.
Beyond the practical savings, an indoor herb garden adds genuine life to a small kitchen. Those little green plants on your counter make the space feel warmer and more inviting, which matters a lot when your kitchen is the size of a parking space. Herbs also purify the air slightly and release wonderful scents when you brush against them or harvest a few leaves.
The best part? You do not need a yard, a balcony, or even a particularly sunny window to make this work. Modern grow lights and compact growing systems have made it possible to grow a useful amount of herbs in spaces as small as a single square foot of counter. I have seen apartment dwellers on gardening forums successfully grow six different herbs on a counter that measured just 60cm by 60cm, which is roughly two feet by two feet.
Best Herbs for a Tiny Kitchen Counter
Not all herbs are created equal when it comes to indoor growing. Some thrive in small containers with limited light, while others demand conditions that are nearly impossible to replicate on a kitchen counter. Here is what actually works in tight quarters, based on my experience and feedback from indoor gardening communities.
Easy Herbs That Thrive Indoors
Basil is the gateway herb for most indoor gardeners, and for good reason. It grows fast, tastes incredible fresh, and handles indoor conditions well if you give it enough light. Thai basil and Italian sweet basil both do well indoors. The key is keeping it warm (above 65 degrees Fahrenheit) and pinching off the flower buds as soon as they appear.
Mint is nearly indestructible. It grows aggressively, which makes it both a blessing and a curse. In a tiny kitchen, keep mint in its own container unless you want it crowding out everything else. Spearmint and peppermint both do well indoors, and they are forgiving about light conditions compared to most herbs.
Chives take up very little horizontal space, making them perfect for narrow containers on a small counter. They can look a bit scraggly indoors according to some gardeners on r/IndoorGarden, but they keep producing reliably. Snip what you need and they regrow quickly.
Parsley (both flat-leaf and curly) does well indoors with moderate light. It has a deep taproot, so choose a slightly taller container, but the footprint stays small. Flat-leaf parsley has better flavor for cooking and is the variety I recommend for most people.
Thyme stays compact and loves the dry conditions typical of heated indoor air. It is a low-growing, slightly woody herb that barely takes up any space. Lemon thyme adds a nice citrus note that works well with fish and chicken dishes.
Oregano is another compact Mediterranean herb that does well in small pots. It prefers drier conditions, so it pairs well with thyme in a shared container. Greek oregano has the strongest flavor and stays relatively small indoors.
Herbs That Struggle in Small Indoor Spaces
Rosemary needs more light than most tiny kitchens can provide, and it grows into a woody shrub that eventually needs a larger pot than your counter can accommodate. It is possible to grow indoors, but it requires a dedicated grow light setup and regular pruning. For a first-time indoor herb gardener, I would skip rosemary until you have more experience.
Dill grows tall and tends to get leggy indoors. It also has a deep taproot that demands a deeper container than most countertop setups allow. If you love dill, you can try growing it, but expect to dedicate more vertical space than other herbs require.
Cilantro bolts quickly indoors (meaning it goes to seed fast), especially in warm conditions. It also has a frustratingly short harvest window. You can grow it, but you will need to succession plant it every few weeks to maintain a steady supply.
Which Herbs Grow Well Together in Small Containers
When counter space is at a minimum, combining herbs in a single container saves room. But you cannot just throw any herbs together. They need similar water and light requirements to thrive as roommates.
The Moisture-Loving Group: Basil, parsley, and chives all like consistently moist (but not soggy) soil. Plant these together in a wide, shallow container and they will coexist happily. This is my favorite combination for a beginner setup because these three herbs cover a huge range of cooking styles.
The Mediterranean/Dry Group: Thyme, oregano, and savory prefer soil that dries out between waterings. They tolerate the dry indoor air that comes with heating and air conditioning, and they do not mind being a bit cramped. A single narrow planter with these three herbs takes up minimal counter space and provides a lot of flavor variety for Mediterranean cooking.
Mint Always Goes Solo: I cannot stress this enough. Mint spreads through underground runners and will dominate any shared container within weeks. Give it its own pot, period. A small four-inch pot of mint on your counter will produce more than enough for mojitos, tea, and cooking.
Soil vs Hydroponic: Which Works Better for Tiny Counters
One of the first decisions you will make is whether to grow your herbs in soil or use a hydroponic system. Both approaches work on a kitchen counter, but they have different tradeoffs that matter a lot when space is tight.
Soil-based growing is the traditional route. You fill containers with potting mix, plant your herbs, and water them by hand. The advantages are low startup cost, simplicity, and flexibility with container choices. You can use recycled containers, mason jars, or any small pot that fits your counter. A soil setup for three to four herbs costs under $20 to start if you already have containers. The downside is that you need to monitor watering closely, and drainage can be messy on a kitchen counter.
Hydroponic growing uses water and nutrient solution instead of soil. Systems like AeroGarden and Click & Grow are popular options that include built-in grow lights and self-watering reservoirs. These systems work well but take up dedicated counter space and cost significantly more upfront. Community feedback on r/Hydroponics suggests they produce faster growth but require an initial investment of $80 to $200 for a compact unit.
For a truly tiny counter (under two square feet of available space), I generally recommend starting with soil. You have more flexibility to squeeze containers into odd corners and adjust as needed. If you have a bit more room and want the fastest possible growth with minimal daily maintenance, a compact hydroponic system is worth considering. Many indoor gardeners on forums report great results with hydroponic systems, though they do occupy a fixed footprint on your counter.
There is also a middle ground: self-watering containers. These are soil-based pots with a built-in water reservoir at the bottom. The soil wicks moisture up from the reservoir, so you only need to refill it every few days instead of watering daily. They cost a bit more than basic pots but solve the overwatering problem that kills so many indoor herbs.
Essential Equipment for Your Countertop Herb Garden
You do not need much to get started, and I am a firm believer in beginning simple rather than buying everything at once. Here is what you actually need versus what is nice to have.
Containers and Planters That Fit Small Spaces
The right container makes all the difference on a tiny counter. Look for narrow rectangular planters that sit against the wall and use depth rather than width. A planter that is six inches wide and eighteen inches long holds three to four herb plants while only taking up the depth of a coffee mug on your counter.
Mason jars are popular for herb gardens and look great, but they have a drainage problem. Herbs sitting in waterlogged soil will develop root rot fast. If you use mason jars, add a layer of small pebbles or activated charcoal at the bottom for drainage, or use the kind with a drainage hole and a tray underneath. A coffee filter at the bottom also works as a simple hack to keep soil from washing out while letting excess water drain.
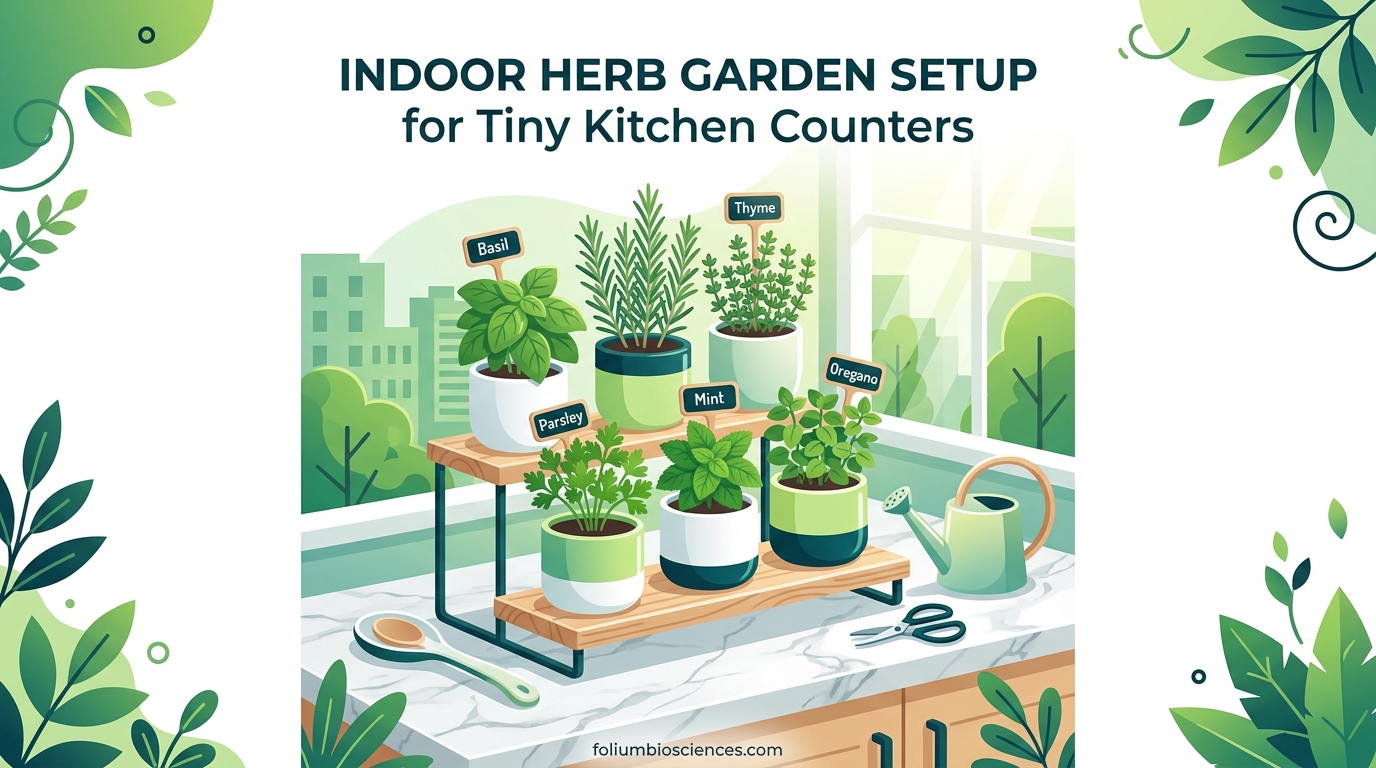
Tiered planters stack multiple growing levels vertically, which is ideal when your horizontal counter space is limited. A three-tier planter can hold six herb plants in the footprint of a single pot. Look for ones with built-in drainage trays to keep your counter dry.
Magnetic herb planters are another space-saving option that attaches to your refrigerator or any metal surface, freeing up counter space entirely. These work best for small, lightweight herbs like thyme and oregano. They are not suitable for larger plants like basil or parsley.
Grow Lights for Kitchen Counters
This is where most indoor herb gardens succeed or fail. Herbs need at least six hours of bright light daily, and most kitchen windows (especially in apartments) simply do not provide enough. If your kitchen has a south-facing window that gets direct sun for most of the day, you might be fine with natural light alone. Everyone else should plan on supplemental grow lights.
Full-spectrum LED grow lights are the way to go. They are energy efficient, produce very little heat, and come in compact designs that work in small kitchens. Clip-on LED grow lights attach to a shelf, cabinet, or window frame and can be angled directly at your plants. They take up zero counter space and cost between $15 and $30 for a good one.
For herbs, look for lights that provide 2,000 to 3,000 lumens and are labeled as full-spectrum or 5,000K to 6,500K color temperature. Set them on a simple plug-in timer for 12 to 14 hours of light per day. Herbs do best with a consistent light cycle, and a timer means you do not have to remember to turn anything on or off.
If you notice your herbs stretching toward the window with long stems and wide gaps between leaves (called getting “leggy”), that is a clear sign they need more light. Move them closer to your light source or add a second grow light.
Soil, Drainage, and Other Essentials
Use a high-quality potting mix, not garden soil or topsoil. Potting mix is lighter, drains better, and is formulated for container growing. Look for mixes that contain perlite or vermiculite, which improve drainage and aeration. Pre-moistened seed-starting mix works well if you are growing from seed.
Every container must have drainage holes. I know it is tempting to skip them for a cleaner look on the counter, but herbs sitting in pooled water will die. Use a saucer or tray under each pot to catch runoff and protect your counter surface.
A small watering can with a narrow spout gives you better control than pouring from a glass or using the tap directly. A spray bottle is also handy for misting herbs that appreciate humidity, like basil and parsley.
A pebble tray is a simple humidity hack that helps in dry indoor environments. Fill a shallow tray with small pebbles, add water to just below the top of the pebbles, and set your potted herbs on top. As the water evaporates, it creates a humid microclimate around the plants. This is especially helpful in winter when indoor heating dries the air.
How to Set Up an Indoor Herb Garden on a Tiny Kitchen Counter
Here is the complete step-by-step process for getting your countertop herb garden up and running. Follow these steps in order and you will avoid the most common pitfalls that derail beginners.
Step 1: Measure your available counter space. Grab a tape measure and figure out exactly how much room you can dedicate to herbs. Write down the width, depth, and height clearance (account for upper cabinets). Most tiny kitchens have somewhere between one and three square feet of counter that can be spared. Knowing your exact dimensions will guide every other decision.
Step 2: Choose your growing method. Based on your space measurement, decide between soil containers, a hydroponic system, or self-watering pots. For most beginners with limited space, soil containers in narrow rectangular planters offer the most flexibility. If you measured at least 18 inches by 10 inches of clear counter space, a small hydroponic system like a three-pod unit could also work.
Step 3: Pick three to five herbs to start. Do not try to grow everything at once. Choose herbs you actually cook with regularly. My recommended starter combo for a tiny counter is basil, chives, and thyme. Basil handles most cooking styles, chives take up almost no space, and thyme stays compact while providing a lot of flavor. Add parsley or oregano if you have room for a fourth.
Step 4: Set up containers with proper drainage. Whether you use one long rectangular planter or several small pots, make sure every container has drainage holes and sits on a tray or saucer. Fill containers with pre-moistened potting mix, leaving about an inch of space at the top for watering. If you are combining herbs in one container, group them by water needs (moisture-loving together, dry-loving together) as I outlined earlier.
Step 5: Position for light or add grow lights. Place your herbs in the brightest spot available. A south-facing window is ideal, followed by east or west. North-facing windows rarely provide enough light for herbs. If you do not have a bright window, or if your counter is away from the window, install a clip-on LED grow light on a nearby shelf or cabinet edge. Set it on a timer for 12 to 14 hours of light per day.
Step 6: Plant your herbs. You can start from seed or buy small starter plants from a garden center. For beginners, starter plants are faster and more reliable. Seeds cost less but take two to four weeks longer to produce harvestable herbs. Gently remove starter plants from their nursery pots, loosen the root ball slightly, and plant them at the same depth they were growing before. Water them in gently.
Step 7: Establish a care routine. Check your herbs every day. Stick your finger about an inch into the soil. If it feels dry, water until moisture runs out the drainage holes. If it feels moist, wait another day. Most indoor herbs need watering every two to four days, depending on the herb, the container size, and the humidity in your kitchen. Rotate the containers a quarter turn every few days so all sides get equal light exposure.
Light Requirements and Best Placement for Small Kitchens
Light is the single biggest factor in whether your indoor herb garden thrives or fizzles out. Get this right and most other mistakes are forgivable. Get it wrong and no amount of perfect watering or premium soil will save your plants.
Most culinary herbs need six to eight hours of bright, direct light daily. In a kitchen with a south-facing window, you might get this naturally, especially from spring through early fall. But during winter months or in kitchens with north-facing windows, the light is almost never sufficient without supplemental help.
If you are lucky enough to have a windowsill above your sink or counter, that is prime herb territory. Line up your pots along the sill where they get direct sunlight without blocking your workspace. If the sill is narrow, use a windowsill extender shelf or a narrow rectangular planter designed to sit on a ledge.
When natural light is not enough, position your herbs on the counter and use a grow light mounted above them. The light should be positioned six to eight inches above the tops of the plants. As the herbs grow, raise the light to maintain that distance. Clip-on grow lights or under-cabinet LED light strips both work well in compact kitchens.
Watch your plants for signs of insufficient light. Leggy, stretched growth with pale green leaves and long spaces between leaf pairs means they are reaching for more light. Compact, bushy growth with rich green coloring means the light situation is working. Adjust accordingly.
Watering and Care Routine for Countertop Herbs
Overwatering is the number one killer of indoor herbs, according to nearly every gardening forum and experienced grower I have encountered. It is an easy mistake to make because wilting from overwatering looks similar to wilting from underwatering, so people see droopy leaves and add more water, making the problem worse.
Here is the simple test I use: stick your index finger into the soil up to the first knuckle (about an inch deep). If the soil feels dry at that depth, it is time to water. If it feels moist, wait. Most herbs prefer to dry out slightly between waterings. The exceptions are basil and parsley, which like consistently moist soil but never soggy.
When you do water, water thoroughly until you see moisture coming out of the drainage holes. Then empty the saucer underneath after 15 minutes so the roots are not sitting in standing water. Shallow, frequent watering encourages weak surface roots. Deep, less frequent watering encourages stronger root systems.
Indoor air, especially in winter with the heat running, is much drier than most herbs prefer. A pebble tray under your plants, as mentioned earlier, helps. You can also group your plants close together. As they release moisture through their leaves (a process called transpiration), they create a slightly more humid microclimate for each other.
For fertilizer, use a diluted liquid organic fertilizer (like fish emulsion diluted to half strength) every two to four weeks during active growing periods. Skip fertilizer during winter when growth naturally slows. Over-fertilizing produces fast, weak growth that is more susceptible to pests and disease, so err on the side of less.
Common Mistakes to Avoid with Indoor Herb Gardens
I have made most of these mistakes personally, and I have read about the rest on gardening forums from frustrated beginners. Learn from our collective failures.
Overwatering. This deserves repeating because it kills more indoor herbs than everything else combined. More plants die from too much love than too little. Check the soil before watering, and when in doubt, wait another day. Yellowing lower leaves and a sour smell from the soil are telltale signs of overwatering and root rot.
Not enough light. A kitchen with one small north-facing window is not going to support sun-loving herbs without supplemental lighting. Be honest about your light situation and invest in a grow light if needed. They are inexpensive and make an enormous difference.
Using containers without drainage. I covered this already, but it keeps coming up in forums. No drainage means water pools at the bottom, roots suffocate, and the plant dies. Every container needs holes. Every container needs a tray.
Crowding too many herbs in one container. It is tempting to pack six herbs into one small pot to save space, but they will compete for nutrients, water, and root space. Stick to two or three compatible herbs per container, max. Give each plant at least four inches of space from its neighbor.
Ignoring pest problems. Spider mites, aphids, and fungus gnats can show up even on indoor plants. One Reddit user in r/IndoorGarden described losing an entire basil plant to spider mites in less than a week because they ignored the early signs. Check your plants regularly, especially the undersides of leaves. Catching pests early makes them far easier to deal with.
Planting mint with other herbs. Yes, I am saying this again because people keep doing it. Mint is a garden bully. It spreads through runners underground and above ground, stealing water, nutrients, and space from everything around it. Always plant mint in its own container.
Creative Space-Saving Ideas for Tiny Counters
When your counter space is truly minimal, you have to think beyond the standard pot-on-the-counter approach. Here are some creative solutions that indoor gardeners have shared in forums and that I have tested personally.
Vertical tiered planters are probably the single best space-saving option for tiny kitchens. These stack two or three growing levels on top of each other, so you can grow six herbs in the footprint of two. Look for ones with angled tiers so each level gets adequate light, and make sure the unit is stable on your counter.
A DIY mason jar garden mounted on a piece of reclaimed wood is both functional and attractive. Attach pipe clamps to a wooden board, slide mason jars into the clamps, and lean the board against your backsplash or mount it on the wall near a window. Each jar holds one herb, and the whole thing takes up almost no counter space. Just remember the pebble drainage layer I mentioned earlier.
Magnetic planter pods attach directly to your refrigerator door. They work best for small herbs like thyme, oregano, and chives. You lose some growing volume compared to a proper pot, but you gain back all that counter space. Several brands make these with built-in drainage.
A narrow shelf or tension rod mounted inside a window frame gives you a second growing tier without eating into counter space. A simple wooden shelf bracket attached inside the window trim holds a row of small pots at window height, where they get maximum natural light.
Hanging macrame planters near a bright window free up counter space entirely. Suspend them from a ceiling hook or a curtain rod bracket. This works particularly well for trailing herbs like thyme and oregano, which cascade beautifully over the edges of a hanging pot.
Keeping Pests Away from Your Indoor Herb Garden
Indoor herbs are not immune to pests, even though they are less vulnerable than outdoor plants. The three most common troublemakers are spider mites, fungus gnats, and aphids.
Spider mites thrive in dry indoor conditions and are tiny enough that you might not notice them until damage appears. Look for fine webbing between leaves and stems, and tiny yellow or white speckles on leaf surfaces. Increase humidity around affected plants (a pebble tray helps) and spray the leaves with a gentle stream of water every few days to knock mites off.
Fungus gnats are those tiny black flies that hover around your pots. They breed in consistently moist soil, which is another reason to let the top inch of soil dry between waterings. A layer of sand or diatomaceous earth on top of the soil prevents adult gnats from laying eggs. Yellow sticky traps placed near your plants catch the flying adults.
Aphids cluster on new growth and the undersides of leaves, sucking sap and causing distorted growth. A spray bottle with diluted dish soap (one teaspoon per quart of water) applied directly to the aphids kills them on contact. Rinse the plant with clean water an hour later to remove any soap residue.
The best pest prevention is healthy plants. Well-lit, properly watered herbs with good air circulation resist pests much better than stressed ones. If you bring in new plants from a garden center, isolate them for a week before adding them to your existing herb garden to avoid introducing pests to healthy plants.
Harvesting Tips for Maximum Yield from Small Herb Gardens
Knowing how to harvest correctly keeps your herbs producing longer and gives you more total yield from the same small plants. The basic rule is never harvest more than one-third of the plant at once.
For basil, always pinch stems just above a pair of leaves rather than stripping leaves from the stem. This encourages the plant to branch out at that point, producing two new stems where there was one. Regular pinching makes basil bushier and more productive rather than tall and sparse.
For herbs like thyme, oregano, and rosemary, snip individual stems from the outer portions of the plant. Cut just above a leaf node (the point where leaves meet the stem) and the plant will produce new growth from that point. Avoid cutting into the woody base of these plants, as they regenerate slowly from old wood.
Chives can be cut down to about two inches above the soil and will regrow completely within a few weeks. This makes them one of the most productive herbs per square inch of counter space. Harvest from the outside leaves first, leaving the inner ones to continue growing.
Mint grows so aggressively that you can harvest it heavily and it will bounce right back. Regular harvesting actually helps keep mint compact and bushy rather than leggy. Cut stems above a leaf pair, just like basil.
The best time to harvest any herb is in the morning after the dew has dried but before the heat of the day. Essential oil concentrations peak in the morning, so your herbs will have the strongest flavor. For cooking, harvest right before you need the herbs for the freshest possible flavor.
FAQ
How to create an indoor herb garden in small spaces?
Start by measuring your available counter space, then choose a narrow rectangular planter or tiered system that fits. Select three to five compact herbs like basil, chives, and thyme. Use well-draining potting mix in containers with drainage holes. Position your garden near a south-facing window or add a clip-on LED grow light on a 12-hour timer. Water when the top inch of soil feels dry, and harvest regularly to encourage bushy growth.
Can I grow herbs on my kitchen counter?
Yes, you can absolutely grow herbs on your kitchen counter. Many culinary herbs including basil, mint, chives, parsley, thyme, and oregano grow well indoors with proper light and watering. The key requirements are containers with drainage, quality potting mix, at least six hours of bright light (natural or from grow lights), and consistent but not excessive watering. A setup as small as one square foot of counter space can produce a useful amount of fresh herbs.
What is the best plant for a small kitchen?
Basil is widely considered the best herb for a small kitchen because it grows quickly, has versatile culinary uses, and stays compact with regular harvesting. Mint is another excellent choice because it is nearly indestructible and produces heavily, but it must have its own container. For a low-maintenance option, chives take up minimal space and regrow rapidly after cutting. Thyme stays very compact and tolerates the dry indoor air common in heated kitchens.
What are common mistakes growing indoor herbs?
The most common mistakes are overwatering (the leading cause of indoor herb death), insufficient light, using containers without drainage holes, crowding too many plants in one pot, and planting mint alongside other herbs. Other frequent errors include using garden soil instead of potting mix, not fertilizing during active growth, ignoring early pest signs, and harvesting incorrectly by stripping plants instead of pinching stems above leaf nodes.
Do I need grow lights for indoor herbs?
You need grow lights unless your kitchen has a south-facing window that receives at least six hours of direct sunlight daily. Most kitchen windows, especially in apartments and during winter months, do not provide enough light for herbs to thrive. An affordable clip-on LED grow light (15 to 30 dollars) on a timer for 12 to 14 hours per day is enough to keep most herbs healthy. Signs your herbs need more light include leggy, stretched stems and pale leaves.
How often should I water my indoor herb garden?
Most indoor herbs need watering every two to four days, but always check the soil first. Stick your finger about an inch into the soil. If it feels dry at that depth, water thoroughly until moisture runs from the drainage holes. If it feels moist, wait another day. Basil and parsley prefer consistently moist soil, while thyme and oregano prefer to dry out between waterings. Always empty drainage saucers after 15 minutes to prevent root rot.
Wrapping Up Your Tiny Kitchen Herb Garden
Setting up the best indoor herb garden for a tiny kitchen counter comes down to three things: picking the right herbs for your space, giving them enough light, and resisting the urge to overwater. Start small with three or four herbs you actually cook with. Use containers with drainage. Invest in a simple grow light if your kitchen does not get enough natural sun. And check the soil before every watering.
The beauty of a countertop herb garden is that it grows with you. Start with a basic setup, see what works in your specific kitchen, and expand from there. You might discover that basil thrives on your counter while thyme struggles, or that a tiered planter makes better use of your space than individual pots. Every kitchen is different, and part of the fun is figuring out what your particular space can support.
I have been growing herbs on various tiny counters for years now, and I still learn something new every season. The fresh basil on my pasta, the chives on my morning eggs, and the mint in my evening tea make the small effort completely worthwhile. Your tiny kitchen can absolutely support a productive herb garden. You just need to work with your space instead of against it, and this guide gives you everything you need to get started today.